
Check Lighting Compliance Before Tinting Charger Tail Lamps
Understand Charger tail light tint, fitment and lighting requirements; a light removable film does not by itself establish safe or legal road use.
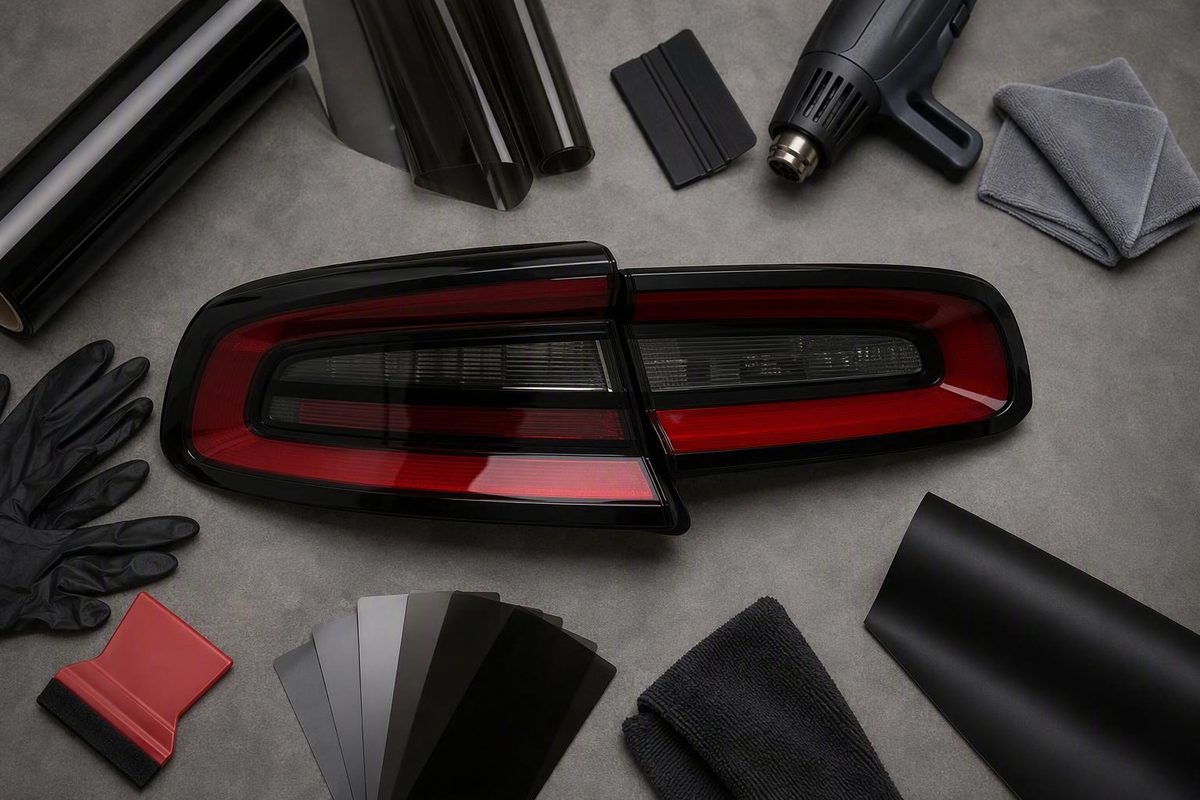
Dodge Charger tail light tint is a cosmetic modification that darkens the rear lamp lenses using film, a coating, a cover, or a smoked replacement assembly. The lowest-risk choice for road use is to keep sound factory lamps unmodified. A light or removable film is not automatically safe or legal, and seeing the lamps illuminate does not establish compliance. Before buying anything, identify your Charger’s exact model year and lamp configuration, then check the current rear-lighting and inspection rules published by the authority where the car is registered and driven.
Tail Light Tint Is a Lighting Modification
Tail light tint changes how the Charger’s rear lighting looks when the lamps are off and, to some degree, how light passes through the lens when they are on. Owners commonly use it to create a darker or more uniform rear appearance.
This is not the same job as tinting vehicle windows. Window films are selected partly for properties such as visible-light transmission, privacy, and heat control. Tail lamps are safety equipment with separate functions: they communicate braking, turning, reversing, and vehicle presence to other road users. Window-film prices, specifications, and legal limits therefore should not be transferred to tail light products.
Federal Motor Vehicle Safety Standard No. 108 covers original and replacement lamps and reflectors. Its requirements include lamp color, photometric performance and visibility, and section S6.2.1 prohibits additional equipment that impairs required lighting. This is why a simple nighttime brightness check cannot establish that a darkened lamp meets the standard. State rules for an in-use vehicle remain a separate check.
Three questions need separate answers:
- Does it fit? A kit must match the exact model year, trim, factory lamp assembly, and any design differences between original and replacement lights.
- Does it preserve lamp effectiveness? The finished lights must remain recognizable under realistic conditions.
- Is it permitted? State or local rules may regulate lamp visibility, displayed color, reflector coverage, and inspection eligibility.
A seller’s “Charger-compatible” label addresses fitment at most. It does not establish that the finished installation satisfies lighting rules in every jurisdiction.
What Film, Coatings and Housings Change
Tint changes the lens surface or replaces the visible lens assembly. The process begins with choosing which areas to darken. Some applications cover nearly the entire lamp; others darken only decorative sections while leaving critical illuminated areas or reflectors uncovered.
With adhesive film, the installer cleans the lens, positions a precut or hand-trimmed piece, conforms it to the lamp’s curves, and finishes the edges. Good alignment matters because a Charger tail lamp can have compound curves, seams, lettering, or narrow transitions where film may crease or lift.
A spray or painted coating is applied in layers. More layers generally create a darker appearance, but controlling the final result evenly can be difficult. Removal may also require more work than peeling off a film.
Smoked covers sit over the existing assembly, while smoked replacement housings substitute a different lamp assembly or lens design. These options may produce a more integrated appearance, but they introduce additional questions about fit, sealing, light distribution, wiring, and supporting compliance documentation.
After installation, each function should be examined independently:
- Parking and tail lamps
- Brake lamps
- Left and right turn signals
- Reverse lamps
- Hazard lights
- Rear reflectors
Check them in direct daylight, darkness, and from off-center angles. A lamp that looks bright while viewed straight on at night may be less conspicuous in sunlight or from the next lane. This visual comparison is useful for finding obvious problems, but it is not a substitute for an applicable inspection or photometric test.
Compare the Modification Types
| Approach | Main advantage | Main drawback | Best suited to |
|---|---|---|---|
| Removable film | Reversible and available in precut shapes | Can crease, bubble, or lift at edges | Owners testing a subtle appearance |
| Spray coating | Can follow complex lens shapes | Harder to apply evenly or reverse | Experienced finishers |
| Removable cover | Quick installation and removal | May affect fit and lamp appearance | Temporary show-oriented changes |
| Smoked replacement assembly | Integrated finished appearance | More costly and dependent on assembly quality | Owners replacing the complete lamp |
A removable product may be easier to undo than a permanent coating, but reversibility does not establish that it is suitable for road use. Keep the factory lamps unchanged unless the exact proposed configuration is supported by applicable compliance evidence.
Spray tint trades reversibility for control over shape and finish. It can look smooth when applied well, but uneven layers, overspray, dust, and excessive darkness are difficult to correct.
Replacement housings should be evaluated as complete lighting products rather than merely as styling accessories. Marketing language, molded markings, or fitment claims should not be treated as proof that a particular housing remains compliant after installation on a particular car.
Check Compliance Before Buying
Start with a decision based on the car, not a generic product photograph.
- Record the vehicle details. Note the model year, trim, factory or aftermarket lamp status, and any previous lens coating or damage.
- Map every lighting area. Identify brake, turn, tail, and reverse-light sections, along with reflectors. Do not assume every red-looking panel is decorative.
- Check current rules. Consult the official state motor-vehicle code, DMV guidance, inspection program, or enforcement authority for the location where the Charger is registered and used. Look specifically for rear-lamp color, visibility, reflector, and obstruction provisions—not just window-tint limits.
- Require evidence for the exact configuration. Ask for documentation covering the lamp assembly with the proposed modification. A shade name, seller assurance or photograph is insufficient; keep the factory lenses unchanged if compliance cannot be established.
- Confirm exact fitment. Ask the seller to identify the supported model year and factory lamp configuration. Compare the kit outline with the actual assembly before removing its backing.
- Document the factory lamps. Photograph every function before installation in consistent daylight and nighttime conditions.
- Install on sound, clean lenses. Existing cracks, moisture, failing clear coat, or residue can undermine adhesion and the finished appearance.
- Repeat the comparison. Use the same camera position, exposure settings, distance, and ambient conditions where practical. Also inspect the lamps in person from several angles.
- Remove or revise the tint if performance is questionable. Do not try to compensate automatically with higher-output bulbs; changing bulbs can alter heat, glare, electrical load, or light distribution.
If a shop will perform the work, ask it to explain how it determined that the modification remains acceptable. Under the federal “make inoperative” provision discussed by NHTSA, certain automotive businesses may not install aftermarket equipment in a way that defeats required safety equipment. NHTSA also notes that lighting impairment is context-specific and that state or local restrictions can still apply; its interpretation concerns a front auxiliary lamp, not Charger tail light film, so it does not approve any particular tint installation (NHTSA’s aftermarket-lighting interpretation).
Common Mistakes
The most serious mistake is choosing tint by its unlit appearance alone. Tail lights exist to communicate, so the illuminated result matters more than how dark the parked car looks.
Another common error is buying by vehicle name without checking the year and lamp assembly. A precut kit may be close enough to advertise broadly yet leave gaps, cross lens boundaries, or cover areas that differ between factory and aftermarket assemblies.
Other avoidable problems include:
- Covering required reflectors
- Assuming a visible brake lamp is necessarily compliant
- Evaluating the lights only at night
- Ignoring turn signals or reverse lamps
- Stretching film so aggressively that it distorts or lifts
- Applying film over wax, sealant, damaged clear coat, or moisture
- Treating a seller’s legality claim as universally applicable
- Assuming owner installation avoids state or local restrictions
There is also an unavoidable styling tradeoff. A darker lens can produce a more dramatic parked appearance, but it leaves less margin for dirt, glare, poor weather, oblique viewing angles, and variations in lamp condition. A subtle tint may offer less visual impact, yet it is easier to evaluate and reverse.
Choose the Next Step
Choose according to your priority:
- Maximum confidence and minimum hassle: Keep the factory lenses unchanged.
- An appearance change: Require evidence that the exact modified lamp configuration meets applicable requirements before considering it for road use.
- A permanent custom finish: Use an experienced automotive lighting or film installer and ask for a clear explanation of reversibility, covered lamp areas, and compliance reasoning.
- A complete lighting redesign: Evaluate smoked replacement assemblies by exact model, documentation, sealing quality, wiring compatibility, and finished lamp performance.
Do not make the decision based on shade names such as “light smoke” or “dark smoke.” Those terms do not tell you how much a product changes a particular Charger lamp. Lens design, light source, product construction, ambient conditions, and coverage area all influence the result.
Your concrete next step is to photograph your Charger’s lamp assembly, record its model year and trim, and mark every illuminated and reflective section. Take that information to the applicable official vehicle authority or inspection program before modifying the lighting. If the evidence is missing, leave the lamps unchanged.
What should a beginner know about dodge charger tail light tint?
A beginner should know that tail light tint is a lighting modification, not simply a decorative version of window tint. Exact fitment, lamp visibility, displayed color, reflector coverage, and local rules all matter. Leave the factory lamps unchanged unless the exact modification is supported by applicable compliance evidence. Before-and-after photographs can document appearance but cannot prove lighting compliance.
What are the main risks of dodge charger tail light tint?
The main risks are reduced recognition of braking or signaling, reflector obstruction, an uneven or damaged finish, failed inspection, and a citation under applicable local rules. Permanent coatings can also complicate restoration or resale. Darkness visible to the eye is not a reliable measure of compliance.
How do you evaluate dodge charger tail light tint options?
Compare options by exact model-year fitment, areas covered, reversibility, installation difficulty, finished visibility, and credible documentation. Inspect every lamp function in daylight, darkness, and off-axis views. If the only evidence is that a product looks lighter or is removable, there is not enough information to recommend it for road use.