
Are Those Bubbles Normal—or Is Your Tint Failing?
Fresh cloudy pockets may shrink during curing; sharp, growing, edge-connected, peeling, discolored, or older bubbles need installer review.
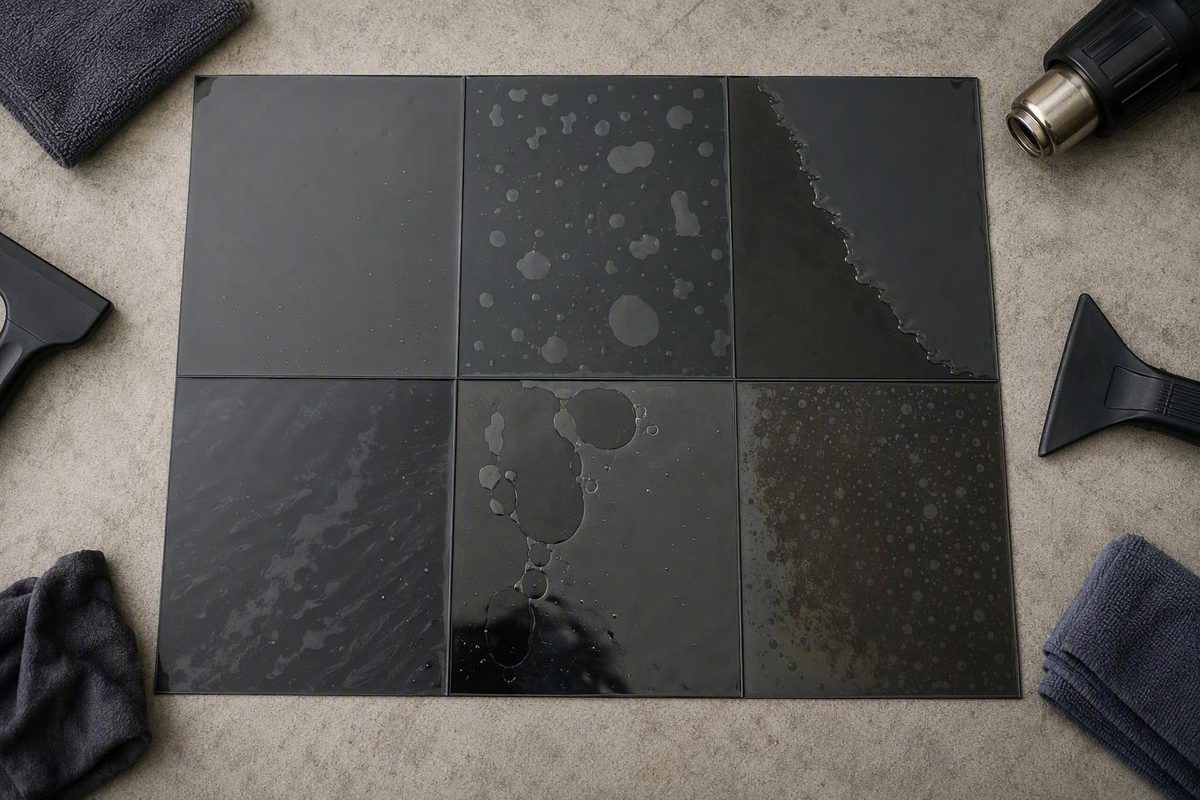
Window tint bubbles do not all mean the same thing. The useful clues are when they appeared, what they look like, where they sit, and whether they are changing.
Small, cloudy pockets in newly installed tint may be retained installation moisture and can shrink as the film cures. A sharp or debris-centered spot, an edge-connected lift, a growing bubble, or bubbling that first appears long after installation is more concerning. Peeling, creases, discoloration, and widespread separation make replacement of the affected film panel more likely.
The safest first move is usually not to press or puncture the bubble. Document it, check the installer’s written curing and care instructions, and protect any possible warranty while deciding whether to monitor the film or request an inspection.
Related: How Much to Tint Car Windows by Film Type.
The quick answer: monitor, inspect, or replace?
Use this three-outcome guide:
| What you see | Best next step |
|---|---|
| Fresh tint with small, cloudy, hazy, milky, or streak-like pockets that are shrinking | Monitor. Follow the product-specific curing instructions and compare dated photographs. |
| A sharp, large, unchanged, growing, debris-centered, finger-shaped, or edge-connected defect | Arrange an installer inspection. It may involve trapped air, contamination, a crease, or an adhesion problem. |
| Older tint with widespread bubbling, peeling, fading, discoloration, or obvious separation | Expect replacement to be more likely. Established adhesive failure generally does not disappear by waiting. |
Automotive tint is commonly installed with a water-based slip solution that lets the installer position the film. Some moisture can remain temporarily between the film and glass, creating cloudy pockets or haze while it evaporates. Solar Solutions describes this distinction between temporary moisture effects and more concerning white-centered, finger-shaped, peeling, or age-related bubbles in its guide to normal and problem tint bubbles.
That does not mean every bubble is normal. A photograph or visual description usually cannot prove that a pocket contains water rather than air, or that a raised point comes from dust rather than an imperfection in the glass. Use appearance to decide what deserves attention—not to make a conclusive diagnosis.
If the tint was professionally installed recently:
- Photograph every affected window.
- Record the installation date.
- Keep the receipt, film information, warranty paperwork, and written care instructions.
- Note whether each defect is shrinking, unchanged, or worsening.
- Contact the original installer before pressing, heating, puncturing, or peeling the film.
Do not rely on routine monitoring if bubbling materially distorts the driver’s view or creates severe glare. Arrange prompt assessment instead. Bubbled or distorted film can make the view through the glass harder to interpret, particularly in sunlight or headlight glare, according to Turbo Tint’s discussion of bubbling and visibility.
How to read the bubble: appearance, location, and movement over time
No visual checklist can replace a hands-on inspection, but the pattern can help you choose a reasonable next step.
| Appearance or location | Likely explanation | What to monitor | Recommended action |
|---|---|---|---|
| Small, cloudy, hazy, milky, diffuse, or streak-like pockets in fresh tint | Retained moisture from the installation solution is plausible | Whether the pockets shrink and the haze clears | Leave them alone and follow the stated curing instructions |
| Clear or sharply outlined pocket that does not change | Trapped air or an installation defect is more concerning | Size, edge definition, and whether it remains fixed | Send photos to the installer and request an inspection |
| Raised point with a white center | Dust, lint, debris, or a pre-existing glass imperfection may be beneath the film | Whether a fixed center remains as surrounding haze clears | Have the installer inspect it |
| Narrow, elongated “finger” | Possible edge lift, crease, or developing adhesive wrinkle | Whether it extends toward an edge or grows longer | Seek early installer review |
| Bubble connected to a corner, seal, or film edge | Weak edge adhesion, movement, contamination, or an improperly set edge may be involved | Lifting, a widening gap, or movement when the window operates | Avoid pressing it back; contact the installer |
| Bubble that grows or multiplies | Continuing separation or adhesive trouble is possible | Spread, new bubbles, peeling, or distortion | Arrange prompt professional assessment |
| Peeling, gaps, creases, or lifted edges | Not ordinary curing haze | Progression or debris entering beneath the film | Request an inspection; replacement may be needed |
| Purple or red discoloration with bubbling | Aging or deteriorating film is more likely | Fading, broader separation, or additional bubbles | Plan for evaluation and likely panel replacement |
| Widespread bubbles in older film | Adhesive deterioration or broad separation is plausible | Peeling, fading, and expansion across the panel | Replacement is more realistic than waiting |
Cloudy and diffuse versus sharp and stable
Small hazy pockets that appear immediately after installation are more consistent with retained solution than a bubble that appears months later. Shrinking is especially important. A noticeable cloudy area that becomes smaller each day can be more reassuring than a tiny, sharply defined pocket that remains exactly the same.
A clear, sharply bounded bubble—particularly near an edge—is more concerning for trapped air or an installation issue. This distinction remains suggestive rather than definitive. Commercial installer guidance uses appearance to separate moisture, air, and contamination, but the supplied sources do not establish a visual test that works reliably for every film or defect.
White-centered spots and fingers
A raised point with a visible white speck may indicate dust or another particle trapped beneath the film. It could also correspond to a pre-existing defect on the glass. A visible center makes solid contamination more plausible, but it does not conclusively identify what lies beneath the film.
A finger-shaped lift is a narrow raised line rather than a round pocket. It can develop from an edge, crease, or adhesive wrinkle. Early inspection matters because an installer may have more options before the film takes a permanent set.
Warning signs
Treat these as reasons to contact the installer rather than ordinary curing haze:
- A bubble that grows instead of shrinking
- A sharply defined pocket that remains unchanged
- A bubble connected to an edge or gap
- Peeling or curling film
- Creases or multiple narrow fingers
- Widespread bubbling
- Purple or red discoloration
- A defect that substantially distorts visibility
Blackout’s commercial installer guidance similarly identifies unchanged large bubbles, growth, peeling, creases, gaps, and discoloration as reasons to seek help in its window tint bubble timeline.
Run a progression check
Take dated photos from the same seat, distance, and angle. Use similar lighting if possible. Include one close-up and one wider photograph showing the affected window.
Compare four things:
- Shrinking: More consistent with curing moisture
- Unchanged: Worth reporting by the installer’s stated deadline
- Growing: A reason to request assessment sooner
- Developing peeling or edge lift: A reason to stop waiting and contact the installer
Do not push the bubble to see whether it moves. That test may alter fresh film, and movement would not conclusively establish what is beneath it.
How long should new-tint bubbles take to disappear?
There is no evidence-supported universal curing deadline for every film, adhesive, vehicle, window shape, installation, and climate.
The available figures come primarily from commercial installer or training guidance rather than independent comparative testing. LA Wrap and Tint School cites approximately 3–7 days for fresh water or slip-solution bubbles, depending on conditions, in its overview of window tint bubble types.
Midwest Tinting says early water-related marks may remain for about 7–10 days and recommends consulting the installer if they persist beyond approximately 10–14 days in its explanation of bubbles during and after installation.
Other installer guidance allows roughly 1–4 weeks, with as long as 4–6 weeks in winter conditions. Those longer estimates should not be treated as proof that every unchanged defect is still normal. They illustrate why the actual film documentation and the installer’s written instructions matter more than a generic deadline.
A practical monitoring schedule is more useful than a promise:
- Soon after discovery: Photograph the windows and record the location, size, shape, and appearance of each concern.
- During the first week: Look for a trend. Shrinking haze is reassuring; unchanged sharp pockets and worsening edges are not.
- At the installer’s stated deadline: Compare the latest images with the initial photographs and report persistent defects.
- Before that deadline, if worsening: Contact the installer promptly if a bubble grows, forms a crease, connects to an edge, begins peeling, or distorts the driver’s view.
This is a documentation framework, not a universal technical curing schedule. The film manufacturer’s documentation and the installer’s written care instructions take priority.
Cooler or more humid conditions may slow moisture loss, but there is no dependable formula for adding a precise number of days.
Ordinary environmental warmth may help moisture evaporate. That does not establish that concentrated heat from a hair dryer or heat gun is safe. Blackout specifically warns that owner-applied heat can damage film, so concentrated heat should not be used without product-specific authorization.
Why window tint bubbles form
The likely causes change with the age of the installation. A cloudy pocket on day one should not be evaluated the same way as a field of bubbles that appears years later.
During a fresh installation
A fresh installation can develop visible pockets or raised areas from several sources:
- Retained slip-solution moisture: Water and a small amount of soap are used to position the film. Residual moisture may create temporary haze, streaks, or pockets.
- Trapped air: Air not fully removed during application may leave a clearer, more defined pocket.
- Dust or lint: A particle under the film creates a fixed raised point and cannot evaporate.
- Oil or cleaner residue: Surface contamination can interfere with uniform adhesive contact.
- Incomplete glass preparation: Material left on the glass can prevent a smooth bond.
- Uneven squeegeeing: Moisture or air may remain where pressure was inconsistent.
- Creases: Folded or stressed film can leave a line or finger that resembles a bubble.
- Weak edge adhesion: A poorly set or contaminated edge can lift and allow the defect to spread inward.
Glass geometry can make application more demanding. Curved rear windows must be fitted without creasing the film, while seals and dotted borders complicate edge work. Defroster lines add surface features that installers must work around. These features do not inevitably cause bubbling; they simply make preparation and application more exacting.
Ceramic Pro’s prevention guide lists inadequate cleaning, trapped air or contaminants, incomplete moisture removal, poor cutting, and oil or dust near the adhesive as contributors to bubbling and peeling during installation.
During early aftercare
Fresh film can be disturbed before its edges and adhesive have set sufficiently.
Potential problems include:
- Rolling a window down before the installer permits it
- Cleaning the interior glass prematurely
- Using ammonia-based, vinegar-based, or otherwise unsuitable cleaners
- Scrubbing with an abrasive pad or rough material
- Scraping the film
If a window was rolled down too soon, look for movement at the top edge, a new crease, or peeling. Document the change and contact the installer rather than trying to stick the film back yourself.
Care restrictions differ by product and installation. That is why one universal waiting period for operating or cleaning windows is inappropriate.
Months or years later
Bubbles that first appear well after installation are not ordinary post-installation drying. More plausible causes include:
- Adhesive deterioration
- Film aging
- Long-term heat and ultraviolet exposure
- Progressive peeling
-
Separation between the film and glass
-
Repeated exposure to unsuitable cleaners or abrasive care
Older film often presents a different pattern: multiple bubbles, broad separation, peeling edges, fading, or color change. In that setting, waiting for “curing” is not useful because the installation is no longer curing.
Material and adhesive quality may contribute to premature failure, as several commercial installer sources assert, but a low price or non-ceramic construction does not prove that a film will bubble. Premium or ceramic film is not immune either. Preparation, adhesive compatibility, workmanship, exposure, owner care, and the specific product all matter.
What to do now without damaging the tint or your warranty
Use this workflow before attempting any correction:
- Identify the installation date. Determine whether the tint is in its initial curing period or has been installed for months or years.
- Locate the invoice and film information. Find the installer’s name, film brand and line if listed, installation date, and warranty registration.
- Read the written care instructions. Check restrictions on lowering windows, cleaning, parking, and reporting defects.
- Photograph every affected window. Take a close-up and a wider view, then label each image with the date and window location.
- Track progression. Record whether each spot is shrinking, unchanged, growing, multiplying, or developing peeling.
- Contact the original installer. Send the evidence before pressing, puncturing, heating, or lifting the film.
- Request written guidance. If the shop proposes an owner action, ask it to confirm that the step is appropriate for the film and whether it could affect coverage.
When contacting the shop, include:
- Installation date
- Invoice or job number
- Film product, if known
- Affected window or windows
- Dated photographs
- Whether the defect is changing
- Recent temperature or humidity conditions
- Whether the window was lowered
- Whether and how the interior glass was cleaned
- Whether anyone has already pressed, heated, punctured, or peeled the film
Photographs can help the installer triage the concern, but they may not reveal whether a raised center contains dust, whether an edge has lost adhesion, or whether the glass itself has an imperfection. An in-person inspection may still be necessary.
Do not assume a warranty will cover the issue. Manufacturing defects, adhesive failure, workmanship, contamination, acceptable dust tolerances, edge damage, and owner-caused damage may be handled differently under the applicable terms. Midwest Tinting, for example, says its own film warranties cover specified bubbling, delamination, adhesive failure, and discoloration, but those terms apply to the products and warranties it offers—not to every installation.
If coverage may apply, ask the installer in writing whether any proposed owner repair would affect the claim. The evidence does not establish that alteration universally voids a tint warranty; the actual written terms control.
Can tint bubbles be fixed, or does the panel need replacement?
Repairability depends on more than bubble size. Film age, contamination, location, edge involvement, progression, adhesive condition, peeling, and discoloration all matter.
| Condition | Small installer correction plausible? | Replacement more likely? |
|---|---|---|
| Fresh, cloudy pockets that are shrinking | Usually no correction is needed during curing | No, unless they persist or worsen |
| Small, recent bubble close to an accessible edge | Sometimes | If it cannot be corrected without damaging the film |
| Early finger-shaped lift | Sometimes, if inspected before it sets | If creased, contaminated, or established |
| Fixed spot with visible debris | Limited; reaching it may require lifting the film | Often, particularly if contamination is extensive |
| Large persistent bubble | Less likely | Yes |
| Multiple persistent bubbles | Less likely | Yes |
| Edge lift that continues to spread | Less likely | Often |
| Creased or stretched film | Unlikely to return to an invisible finish | Yes |
| Peeling or widespread separation | No meaningful cure-by-waiting | Yes |
| Failed or deteriorated adhesive | No | Yes |
| Purple, red, or broadly faded film with bubbles | No | Yes |
| Older film with established bubbling | Unlikely | Yes |
A trained installer may sometimes correct a small, recent, edge-adjacent pocket or an early finger-shaped lift. Success is not guaranteed.
Contamination is particularly limiting. Water can evaporate; a dust particle cannot. Reaching the particle may require lifting the film, which risks introducing more contamination or damaging the adhesive. Depending on its location and the film’s condition, replacing the affected panel may produce the cleaner result.
Replacement generally means replacing the film on the affected window, not automatically re-tinting every window on the vehicle. When evaluating a quote, readers can also compare the scope of the work with current car window tint pricing, while recognizing that vehicle shape, film type, and installation labor affect the total.
Established bubbling in older tint is materially different from initial curing moisture. If the adhesive has deteriorated or the film has broadly separated, waiting will not restore the bond. Jet Black Tint similarly distinguishes minor edge issues from spreading peeling, multiple bubbles, separation, or discoloration that tends to favor removal and replacement of deteriorated tint.
Rear glass deserves additional caution. Turbo Tint specifically identifies rear-window removal as a defroster-line risk, so a qualified tint professional should evaluate bubbled rear-window film before removal is attempted.
Should you pop, press, squeegee, or heat a tint bubble?
The conservative answer is no—not on fresh or potentially warrantied tint unless the manufacturer or installer provides product-specific instructions.
The supplied commercial guidance conflicts. Window Kote describes a DIY method involving warmth, puncturing, and pressure, but provides no film-manufacturer validation showing that the process is safe across products. By contrast, other installer sources expressly warn owners not to use needles, cards, hair dryers, or similar methods.
That disagreement is a reason for caution, not a menu of experiments. Do not assume that a method demonstrated on one film, window, or defect applies to yours.
Possible consequences of an unverified repair include:
-
Scratched film
-
Stretched or distorted film
- Damaged adhesive
-
Adhesive residue
-
Complications under the applicable warranty terms
- Damage to rear-window defroster lines
Do not confuse ambient warmth with concentrated heat. Warm, dry weather may affect how quickly residual moisture evaporates. It does not follow that directing a hair dryer or heat gun at the film is safe.
Puncturing a bubble creates a hole in the film but does not correct contaminated glass, failed adhesive, or a crease. Pressing a card over a particle may mark the film without removing the underlying cause.
If distorted tint obstructs the driver’s view or creates severe glare, seek faster professional assessment rather than experimenting with the film. Avoiding DIY manipulation is a risk-management recommendation; it does not mean a trained installer can never correct a small defect with suitable tools and product knowledge.
How to reduce the risk of bubbles next time
No film category is bubble-proof. Risk reduction begins with preparation and installation, then continues through aftercare.
Installer-selection checklist
Ask prospective shops how they handle:
- Thorough cleaning and decontamination of the glass
- Dust control and installation in a suitable workspace
- Residue from previously installed film
- Final squeegeeing and inspection
- Top-edge finishing and seals
- Dotted borders and tight corners
- Curved rear glass
- Rear-window defroster lines
- Written curing and aftercare instructions
- Workmanship and product warranties
- Acceptable contamination or dust tolerances
Experience with curved rear glass is especially relevant because the film must conform cleanly without creasing. A controlled workspace also helps limit airborne contamination, though no shop should promise that every installation will be microscopically dust-free.
Warranty questions to ask before installation
Get answers in writing where possible:
- What film brand and product line will be installed?
- Who backs the warranty—the installer, distributor, or manufacturer?
- Is workmanship covered separately from film defects?
- Does coverage include bubbling, peeling, delamination, adhesive failure, or discoloration?
- How does the warranty treat dust or contamination?
- Is there an acceptable imperfection tolerance?
- What aftercare actions can affect coverage?
- Is warranty registration required?
- What documentation must the owner keep?
- If one panel fails, is that panel eligible for replacement?
Do not choose film solely on the claim that ceramic or premium film cannot bubble. It can still be affected by contaminated glass, poor preparation, edge problems, incompatible care, or workmanship. Evaluate the actual product documentation, installer practices, and written warranty rather than relying only on a category label.
Aftercare
After installation:
- Follow the installer’s stated waiting period before lowering windows.
- Do not clean the interior glass until permitted.
- Leave temporary cloudy pockets alone.
- Avoid catching or rubbing exposed edges.
- Report a crease, gap, or lifted edge rather than pressing it down.
- Keep the invoice and film details.
Once cleaning is permitted, choose a cleaner labeled safe for tinted windows and use a soft microfiber cloth. Avoid ammonia-based cleaners, vinegar, harsh chemicals, abrasive pads, razor blades, and scraping. Midwest Tinting specifically recommends tint-safe products or mild soapy water while warning against ammonia-based products and vinegar.
After the stated curing period, inspect the edges in good light. Report lifting, gaps, persistent bubbles, or new creases before attempting to press them back down.
Prevention: what you control and what the shop controls
Owner-controlled
- Follow written curing restrictions.
- Wait before operating or cleaning the windows.
- Use tint-safe cleaner and soft microfiber.
- Avoid scraping and abrasives.
- Inspect and report defects early.
- Preserve paperwork and warranty information.
Installer-controlled
- Clean glass preparation
- Contamination control
- Correct film handling and positioning
- Thorough removal of air and excess solution
- Careful work around edges, seals, dots, curves, and defroster lines
- Product-compatible application
- Clear written aftercare and warranty terms
Frequently asked questions
Will window tint bubbles go away on their own?
Some will. Small, cloudy or hazy pockets that appear immediately after installation may contain retained slip-solution moisture and can shrink as the tint cures. Not every bubble will disappear.
A sharply defined pocket, visible particle, finger-shaped lift, edge connection, growth, peeling, discoloration, or late appearance is more concerning. Established bubbling in older film is unlikely to resolve merely by waiting.
How long should I wait before contacting the tint installer?
You do not need to wait to notify the installer; early photographs can preserve a useful record. Whether the film needs intervention is a separate question.
Follow the manufacturer’s and installer’s written deadline. Commercial guidance ranges from several days to a few weeks, with some installers allowing longer in cold conditions. Contact the shop promptly if the defect grows, peels, creases, connects to an edge, or affects visibility—even if the broad curing period has not ended.
Can I pop a window tint bubble with a needle?
Do not puncture fresh or potentially warrantied tint without product-specific written approval.
Commercial sources disagree about puncturing, but the available techniques are not validated for every film. Rear-window work adds the separate concern of damaging conductive defroster lines.
Does cold, heat, or humidity change how long window tint takes to cure?
It can. Cooler or more humid conditions may slow moisture loss, while ordinary warmth and drier conditions may help evaporation. The exact effect depends on the film, adhesive, glass, installation, and environment, so there is no dependable universal climate adjustment.
Do not use that general relationship as justification for concentrated heat. A hair dryer or heat gun may damage film or adhesive unless the product manufacturer or installer specifically authorizes the method.
Does a window tint warranty cover bubbles or peeling?
Possibly, but coverage cannot be assumed. Warranties may distinguish among manufacturing defects, adhesive failure, installer workmanship, contamination, acceptable dust levels, aging, chemical damage, and owner-caused edge damage.
Check the written terms, retain the invoice and film information, and contact the original installer before altering the tint. Ask whether an inspection is required and whether any proposed owner action would affect coverage.
The simple rule is to judge window tint bubbles by when they appeared, what they look like, and whether they are shrinking or worsening. Fresh cloudy pockets may only need time under the product’s stated curing instructions. Sharp, growing, contaminated, edge-connected, peeling, discolored, late-forming, or visibility-distorting defects should be documented and shown to the installer.
Before pressing, puncturing, heating, or peeling anything, protect the film, the rear defroster lines, and any possible warranty by obtaining product-specific guidance.