
Precut Window Tint Kits: Fit, Cost and DIY Trade-Offs
Learn what precut window tint includes, what still makes installation difficult, how to choose a kit and when professional tinting is worth the cost.
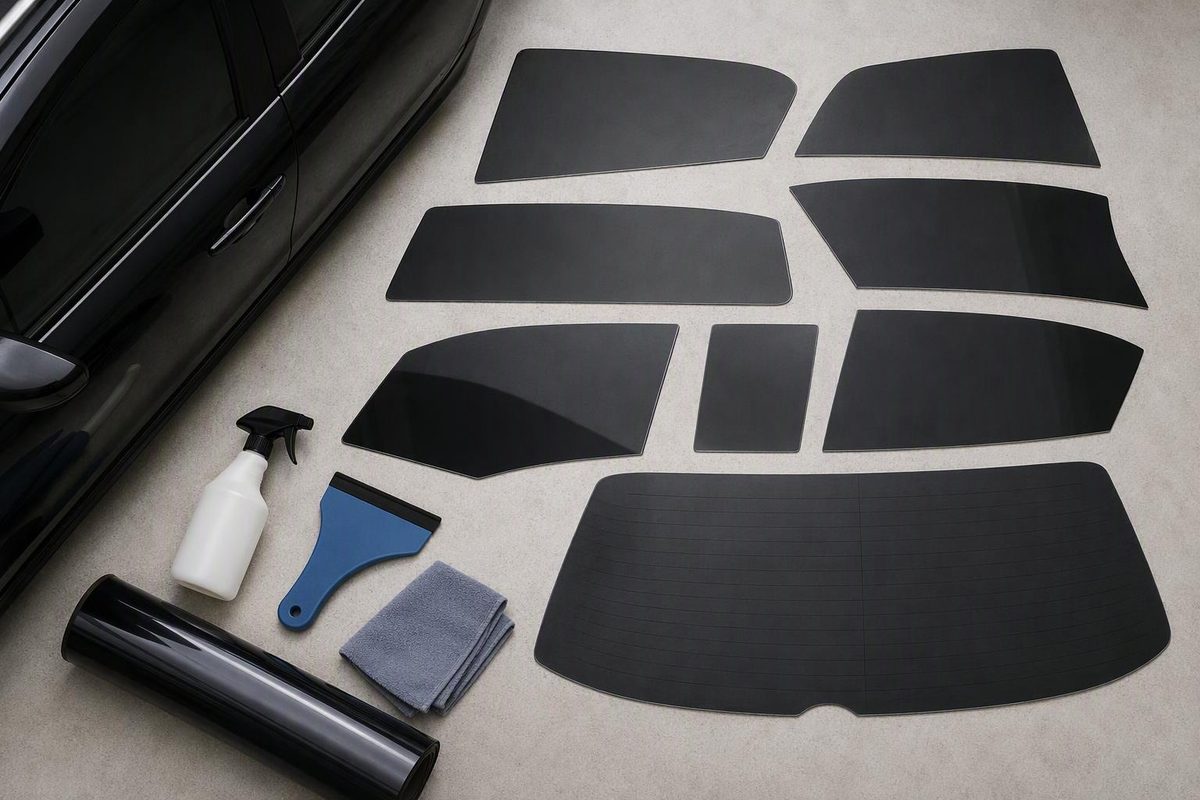
Precut window tint is film cut to the window shapes of a specified vehicle. It removes most or all of the pattern cutting required when working from a roll, but it does not remove the difficult parts of installation: cleaning the glass, handling exposed adhesive, working around seals and shrinking film to fit curved glass.
For a patient beginner, a two-window precut kit can be a practical project. A complete car—especially one with a deeply curved rear window—is a much less forgiving place to learn.
What “precut” actually means
A seller selects a stored pattern based on the vehicle’s year, make, model, body style and sometimes trim, then cuts the film before shipping it. Depending on the package, a kit may include:
- Two front-door pieces
- Side- and quarter-window pieces
- A rear-window piece
- A windshield sun strip
- Installation tools or optional replacement pieces
Confirm exactly which windows are included. “Full kit” may still exclude the windshield, sunroof or small quarter glass, and “precut” is not a standardized promise about how much finishing work remains.
Most importantly, precut does not automatically mean pre-shrunk. A computer-cut rear-window piece may still need controlled heat shrinking before it will conform to curved glass. Ask the seller whether any edge trimming or shrinking is required rather than inferring this from the product name.
The real advantage: less cutting near the car
A correctly matched kit offers three useful benefits:
- No pattern has to be created from a roll. This saves material and removes one source of sizing errors.
- Less blade work is required near the glass and seals. That reduces—but does not eliminate—the risk of scratched glass or damaged trim.
- The starting material cost can be lower than professional installation. The trade-off is that you supply the preparation, labor and risk of replacing a damaged piece.
Budget for more than the film. Depending on what the kit includes, the job may also require slip solution, spray bottles, lint-free towels, hard cards or squeegees, gasket tools and a suitable heat gun. A creased or contaminated piece adds replacement cost and delay.
What precutting does not make easy
Contamination control
A speck of dirt, hair or lint trapped against the adhesive can remain visible after installation. The glass, seals, tools, hands and nearby trim need to be clean. Work in a sheltered, well-lit area rather than outdoors in wind or dust.
The adhesive and glass are normally wetted with an appropriate slip solution so the piece can be positioned before it grabs. Follow the film seller’s instructions for solution strength and installation method; too much or too little slip can make handling harder.
Film handling
Thin film can crease, fold onto itself or collect contamination while being moved to the inside of the glass. A precut edge also provides little spare material to hold. Once a hard crease forms or adhesive sticks to itself, replacing the piece may be more realistic than trying to rescue it.
Roll-down windows and seals
A correctly shaped pattern still has to be positioned at the top edge and tucked cleanly below the lower seal. Misalignment can leave a light gap, catch the film when the window moves or cause an edge to lift. Tight seals may need to be pulled back with a suitable tool; forcing film into them can crease it.
Curved rear glass
The rear window is usually the hardest part of a full kit. A flat piece must conform to compound curvature, while the third brake light, headrests, parcel shelf and defroster lines may restrict access. Heat shrinking is a separate skill from cutting. Too little can leave raised “fingers”; excessive or poorly controlled heat can distort the film.
For a first attempt, two roll-down side windows are a more manageable project than a one-piece rear window.
How to choose a precut kit
Do not buy on darkness and price alone. Check these details before ordering:
- Exact vehicle configuration: Verify model year, body style, door count and trim. Ask about midyear glass changes, and compare any pattern diagram with the vehicle.
- Included windows: Confirm every piece in writing, particularly quarter glass, the rear window, windshield strip and sunroof.
- Film manufacturer and series: “Ceramic” or “carbon” alone does not identify performance. Request the exact product line and its technical data sheet.
- Specifications at the chosen shade: Compare visible light transmission (VLT), total solar energy rejected (TSER), visible reflectance and other published ratings at similar VLT levels. A darker label does not by itself prove better heat control.
- Shrink and trim requirements: Ask whether the rear piece is pre-shrunk and whether any piece requires final trimming.
- Pattern orientation and labels: Pieces should be identifiable by window and adhesive side. Clear labels reduce the chance of handling or installing the wrong piece.
- Replacement policy: Custom-cut goods may have limited returns. Distinguish a seller’s responsibility for an incorrect pattern from your responsibility for a creased or contaminated piece.
- Warranty: Determine whether coverage comes from the film manufacturer, the kit seller or neither—and whether DIY installation is eligible. Product replacement, labor coverage and installer-backed workmanship are different protections.
If heat control is the goal, compare products at a similar VLT rather than assuming either film category is always superior. Our carbon-versus-ceramic comparison explains how to compare specifications without declaring a universal winner.
Check the finished VLT before ordering
The VLT printed on a package generally describes the film. Tint rules may instead apply to the completed combination of film and the vehicle’s existing glass. A useful estimate is:
glass VLT × film VLT = estimated finished VLT
For example, 80% glass with 35% film produces an estimated 28% finished VLT:
0.80 × 0.35 = 0.28
That calculation is only a planning estimate. The existing glass may not match an assumed value, product tolerances apply, and an enforcement meter can produce a different result. Measure the bare glass when the legal margin is tight rather than ordering film to sit exactly on a threshold.
Rules also vary by window, vehicle classification and jurisdiction. Texas DPS says the side windows immediately to the right and left of the driver must provide at least 25% light transmission when the film is measured with the original glass; the same guidance sets a maximum luminous reflectance of 25% for those windows (Texas Department of Public Safety).
New York DMV says the windshield and front side windows must transmit at least 70% of outside light. It also applies a 70% requirement to rear side windows on vehicles federally labeled as “Passenger Car,” while its rear-window rule has a two-outside-mirror exception (New York DMV). These examples are not interchangeable: check the current official rules for your jurisdiction, vehicle class and each window before choosing a shade.
DIY kit or professional installation?
A precut kit makes the most sense when the vehicle pattern is clearly identified, the glass and seals are in good condition, you have a clean indoor workspace, and you accept that a piece may have to be replaced. Starting with two side windows limits both cost and difficulty.
Professional installation is easier to justify for a curved rear window, frameless or unusually shaped glass, expensive premium film, old adhesive contamination, tight interior access or a result that needs documented product and labor coverage. A professional quote includes more than raw film: preparation, fitting, installation time and usually some form of workmanship support. Our window-tint cost guide explains how to compare packages on a consistent scope.
Precut film solves the pattern-making problem. It does not solve preparation, shrinking or technique. Treat it as a way to make a manageable DIY job simpler—not as a guarantee of a professional finish.